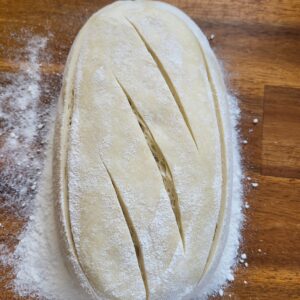
Homemade Perfection: Small-Sized Sourdough Loaf Recipe
Who doesn’t love eating a whole loaf of bread, especially after spending all that time preparing, mixing, timing, and baking? This small sourdough loaf recipe is still 65% hydration like my favorite sourdough recipe, but it is 25% smaller. This is a great size loaf as it is easy to cut, easy to store, and you don’t need to worry about uneaten bread going to waste.
You can also use this recipe to make the dough into baguettes which is great for sandwiches and soups alike.
Sometimes it can be intimidating when learning how to bake. Using a slightly smaller amount of dough and ingredients can be a great way to overcome the worry of wasting valuable sourdough starter and flour!
Using a smaller amount of ingredients is also easier to work with and takes up less space in your fridge while proofing.
Practice Makes Perfect
As we all know practice makes perfect. This is of course the same while baking. The smaller sized loaves are easier to handle, whether that is transferring them from the counter to the basket or counter to the oven.
Scoring your beautiful loaves right before baking is also made easier with a smaller loaf. This makes picking them up and placing them in the Dutch oven without disturbing all the hard work you have put in a breeze.
Storing
While baking it makes sense to bake at least two loaves at a time, but unless you eat a lot of bread this can lead to some waste.
To avoid wasting any precious bread I like to leave one on the counter for eating now, and freeze the other one for later.
Slice the entire loaf up and place all the slices in an airtight container and just remove the slices as you need, or freeze the loaf whole and remove from the freezer.
Keep in mind that freezing the loaf whole will take a bit of time to thaw out, whereas the slices thaw a lot quicker.

Small Sourdough Loaf
Equipment
- 1 Digital Scale Use a digital scale for accuracy and consistency.
- 1 Mixing Bowl To mix dough in, and bulk ferment.
- 2 Banneton You can use loaf pans also but a proper proofing basket is best.
- 1 Dutch Oven You can bake in a loaf pan, a Dutch oven will dramatically improve results.
Ingredients
- 600 Grams Flour All-purpose works just fine, organic if you have it.
- 390 Grams Water Slightly warm water 75F-85F (24C-29C).
- 90 Grams Active Sourdough Starter Active starter is when your starter has been fed and has doubled in size.
- 13.5 Grams Kosher Salt
Instructions
Mixing
- Add all the water to the mixing bowl. 390 Grams Water
- Add all the salt to the water and swirl around until dissolved. 13.5 Grams Kosher Salt
- Add all the starter, use a fork or your hand to swirl around until evenly broken up. 90 Grams Active Sourdough Starter
- Add all the flour and mix until all the flour and water are combined. 600 Grams Flour
- Cover, and let rest for 1 hour.
Bulk Ferment & Gluten Development
- Perform a set of stretch and folds, cover and rest 30min.
- Perform a set of stretch and folds, cover and rest 30min.
- Perform a set of stretch and folds, cover and rest 30min.
- Perform a set of stretch and folds, cover and rest 30min.
Shaping
- Turn dough out on counter, divide evenly in two.
- Loosely form each piece into a ball, rest 15min.
- Shape each dough ball into an oval shape, folding the edges in on itself to create a tight smooth surface.
- Place each shaped loaf into a lightly dusted proofing basket.
- Place each loaf and basket into a plastic bag and place in the fridge for 12-18 hours, or even up to 36 hours.
Baking
- Preheat oven with dutch oven inside to 500F, approx. 30min.
- Remove one loaf from the fridge and turn out on counter.
- Score the loaf with two ¾ inch deep slices down the length of the loaf.
- Gently place the dough in the dutch oven with the lid on.
- Place the dutch oven in the preheated oven and bake for 25min.
- Remove the lid of the dutch oven and turn the heat down to 450F.
- Bake for an additional 20-25min, or until the desired color on the crust has been reached.
- Repeat for second loaf.
- Rest baked loaves on a cooling rack until completely cool.
- Eat.
Notes
- Use rice flour to dust the proofing baskets.
- The longer the proofing time in the fridge (up to about 36 hours) the better the flavor of the bread.
- Freeze one of the small sourdough loaves whole, or sliced in an airtight bag or container.
